Pages

Showing posts with label Stripes Embossing Folder. Show all posts

Tuesday, 18 March 2014

Card Swap


Today's card is one I made for this month's card swap. Jane set the challenge to use embossing so I chose the Stripes Embossing Folder. I took a piece of Whisper White cardstock and stamped images from Stippled Blossoms - a much neglected set which needs to come out again! It is a 2-step set so I stamped the base flower in Pink Pirouette and, using my stamp-a-ma-jig, overstamped using Rose Red with a few Pear Pizzaz leaves dotted around. I then ran this through the BigShot placing just the bottom half of the card in the embossing folder. It is matted onto Rose Red and then onto a card blank with the addition of a sentiment from Four You, punched with the Scallop Oval Punch and matted onto an Apothecary Accents Framelit.
That's all for today, back soon
Margaret x

Sunday, 1 September 2013

Simples Sunday


Another 'had inspiration' card from me today and this time even more obscure than ever before!
Whilst waiting for the ladies to come to my class the other day, I was sitting having a coffee in my lounge - the sun was shining and making shadows through my vertical blinds (which were closed at the time) when suddenly the Stripes Embossing Folder and Lovely as a Tree popped into my sad little brain!!
I randomly stamped the tree onto Very Vanilla using Basic Gray, ran it through the Stripes Embossing Folder, matted it onto Basic Black and then onto a Naturals Ivory card blank. A (retired) sentiment was punched out with the Hexagon Punch and layered onto a Basic Black hexagon, card finished in 5 minutes!
Here is a photo of the inspiration - what do you think of my interpretation???? Polite comments only please :0)


Margaret x

Saturday, 13 July 2013

Soft Sky Butterflies


I know that Saturday is usually 'Less is More' day but today I don't have time to craft so I am posting a card the ladies made at class the other day. It's made with the lovely new colour, Soft Sky, and the Papillon Potpourri stamp set (again!).
The strip running down the card was punched at one end using the Artisan Label punch and then run through the Stripes Embossing folder. The butterflies were stamped in Soft Sky and then punched out using the Elegant Butterfly punch. The sentiment we used is from Perfect Pairs.
Matted and layered onto Soft Sky and a white card blank, a few Basic Rhinestones added and card done!!
If you would like to place an order with me please don't hesitate to get in touch and, don't forget, I am offering free p&p in July with all orders of £50 or more.
Have a lovely weekend, keep cool and I'll be back soon x

Monday, 24 June 2013

New Colour Sneak Peek


I'm not really a 'pink' person myself but, if you are, then the new SU Strawberry Slush is right up your street. This is a really vibrant colour and not one of your wishy-washy pinks and has a name which sounds good enough to eat!!!
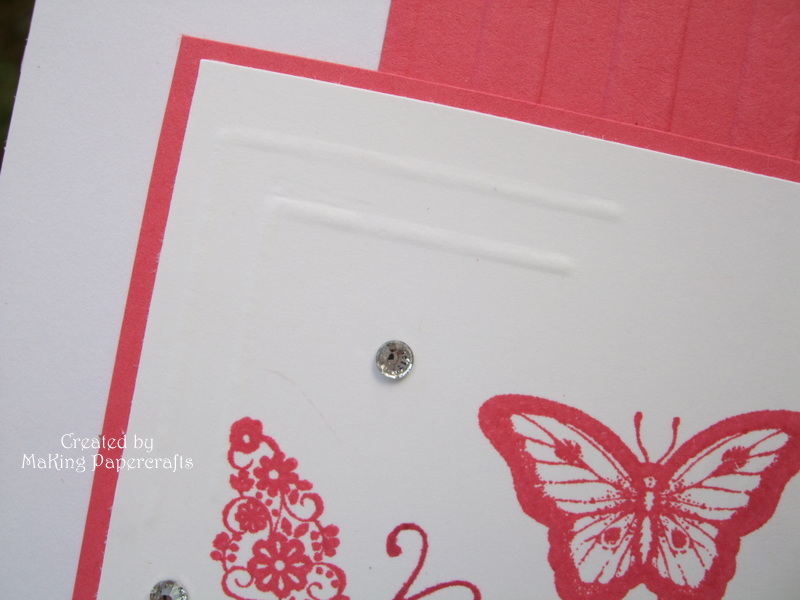
This is another very simple card using the Papillon Potpourri stamp set and co-ordinating punch for the large butterfly third from the left (the others were stamped directly onto the Whisper White panel). For the pink panel going down the card I simply shaped one edge using the Scallop Border Punch and then ran through the Stripes Embossing Folder. I added a little bit of scoring/embossing on two corners and few Basic Rhinestones were dotted around to add a bit of bling!
The new annual catalogue goes live on 2nd July so if you would like to purchase any supplies then please don't hesitate to contact me - I am offering free p&p (normally £4.95) on orders over £50 until July 31st.

Sunday, 16 June 2013

Simples Sunday Sneak Peek


For my Simples Sunday card today I am combining it with a Sneak Peek at some new SU products which you will be able to buy on 2nd July when the annual catalogue launches. My card shows you a couple of new things combined with a few old favourites. Can you spot the new ones?
I used Naturals Ivory and Chocolate Chip cardstock along with the Stripes Embossing Folder and buttons from the Sweet Buttons Embosslits die and that's all I can share with you for now!
Don't forget if you would like me to order any products for you, hold a workshop in your home, interested in attending my monthly classes or even joining my team and becoming a demo yourself then I am always happy to help (contact details can be found on the tab at the top).
Until next time, enjoy the rest of the weekend x


Saturday, 25 August 2012

Five of Six

A bit of a fun card today to go with my set of six. All fairly self-explanatory I think so I'll just give you the basics. The base is a Top Note diecut which was embossed with the Stripes Embossing Folder and a hole cut with a circle punch - the same circle punch was used to punch a black circle to fill in the hole. The owl was punched with the Owl Bulder punch using Crumb Cake, Chocolate Chip DSP Whisper White and Basic Black. The leaves and wings were punched from the Bird Builder punch and the banner is just a thin strip of Basic Black cardstock with a non-SU pearl fixed to the top. The sentiment is a retired stamp on Very Vanilla and cut into a banner shape with scissors.

One more to go!!

Sunday, 13 May 2012

A Challenge and an Appeal


My card today is a dual purpose card and uses the cute Young Vermillion. The challenge this week at CAS-ual Fridays is a CAS card using a bird and I also wanted to make some cards for a charity appeal so I thought I would kill two birds with one stone so to speak. As you will know by now I am a huge fan of Vicky (aka Crafting Clare) and when I visited her blog yesterday she had written about an appeal by Jo Street (view Jo's blog here) - this is what Vicky wrote;

I always like to feel that our crafting can help others. I was reading this post by Jo Street of Dinky Daisy Designs yesterday - she has been devastated by the plight of a little girl at a playgroup her son attends. Jo wants to do something to help so she's holding a sale of cards to raise money for Candlelighters, the organisation which will be caring for the little girl and supporting her stricken family. It seems to me that it's easy to make two cards if you're making one and I think lots of us could spare some from our stash, so do pop over to Jo's blog and offer your services.
I completely echo Vicky's last statement so if you can spare a card or two please get in touch with Jo and let's help her raise a lot of money to help this very worthwhile cause.

Now onto the card - I stamped the bird onto a piece of Naturals Ivory cardstock in Early Espresso and blended the colour with a blender pen then I embossed the bottom section of the cardstock with the Stripes Embossing Folder and tied round some Linen Thread before matting onto a piece of Cherry Cobbler cardstock and fixing to a white card blank. I made a frame from Cherry Cobbler cardstock using the Framelits dies and positioned this over the bird using silicone glue to raise the frame up a little. The sentiment was punched with the Word Window punch and matted onto a Modern Label.
Enjoy the rest of the weekend and the sunshine (while it lasts!) x

Saturday, 5 May 2012

Yellow Sketch


The first thing I do at 8 o'clock on a Saturday morning is look at the challenge for the week over at Less is More and I have to say I didn't like what I saw this morning - a colour challenge using Yellow - because I'm not a great fan of this particular colour. So onto my next stop which  is always the Simply Stampin' challenge where I find a sketch for this week (top right).
So my very own challenge this week is to use yellow with the sketch :0)
I used So Saffron for my base card and used a piece of Whisper White as a mat. Before fixing this to the card blank I partially embossed two horizontal lines, using the Stripes Embossing folder, down the RH side of the card and then attached a knot of So Saffron Taffeta ribbon across the card. I then cut a piece of Whisper White using the smallest of the Framelits dies and a So Saffron frame using the smallest die and the next size up. An image from Bright Blossoms was coloured with  Daffodil Delight and Old Olive markers and stamped onto the white die cut (I have this set in clear mount so I didn't even need to use my stamp-a-ma-jig!) This was positioned onto the card before adding a tiny flower, punched with the Itty BittyShapes Punch , with a Basic Pearl in the centre and some more pearls underlining the sentiment. The bottom picture shows the inside of the card (which for some reason, despite taking 10 photos, I couldn't seem to get in focus!) and this is a diecut using the largest of the Framelits dies with the flower from Create a Cupcake stamped in one corner.
I hope you all have a lovely Bank Holiday weekend and now I must go and get ready for my grandchildren who are coming to visit this afternoon - although I think the housework would be best left until they are gone :0)

Wednesday, 14 March 2012

Flowers for Easter

I have made another card with flowers made from the 5-Petal Punch, similar to the one I posted the other day, but this time for Easter. I adapted the technique slightly so that I could make some of the flowers look more like buds rather than fully opened. I used Whisper White cardstock and sponged with Daffodil Delight for the flowers and Certainly Celery for the stems. These were positioned onto a piece of Daffodil Delight cardstock which I partially embossed with the Stripes Embossing Folder and grosgrain ribbon tied around before mounting onto a white card blank. The tiny flowers were punched with an Itty Bitty Punch Shapes and a Basic Pearl added to the centre. The sentiment was punched with the Scallop Oval punch and matted onto an Extra Large Oval and mounted onto the card with dimensionals.
Despite the sun shining beautifully I couldn't find anywhere in my house that I could take a photo without it either being too dark (the yellow looked like Mustard!) or getting a shadow of me & the camera on the card so I took it outside and framed it with some tiny daffodils that have just decided to come out in my garden I've still got shadows but at least it was from the ribbon and not me!

Tuesday, 24 January 2012

Perfect Postage

 The heart card I showed you yesterday was made with a stamp from Perfect Postage and today I have three cards to share using the rest of the set.


The first one uses the cake stamp which I coloured with Daffodil Delight, Pacific Point & Crumb Cake markers. I punched them out with a circle punch, inked around the edge and matted them onto a larger circle of Pacific Point. They were placed onto a rectangle of Very Vanilla cardstock and a sentiment, from Happiest Birthday Wishes, was stamped in Pacific Point towards the bottom of the card. A knot of Crumb Cake Seam Binding was placed around the card and the whole thing was matted onto a Crumb Cake card blank.


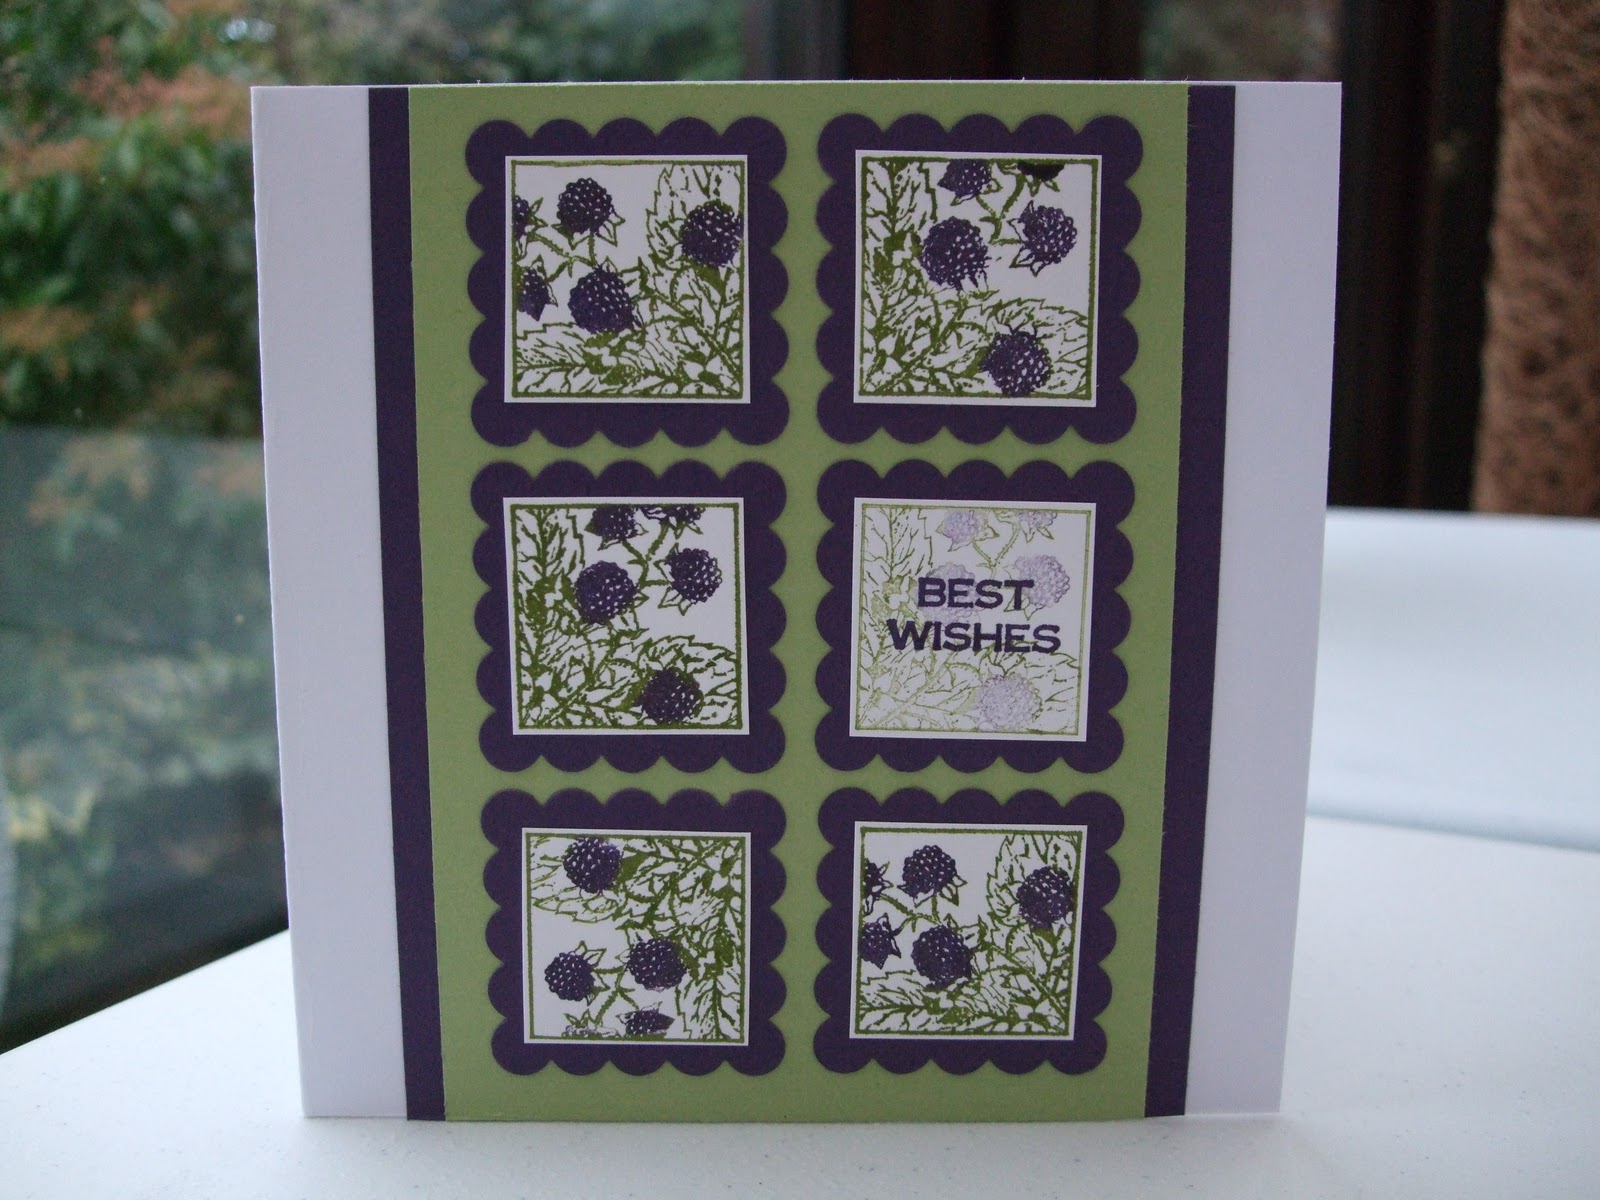
The next one is the 'bramble' stamp which again was coloured with markers in Elegant Eggplant and Old Olive. I stamped five of these and a sixth one was stamped off so it just left a very faint image enabling me to stamp the sentiment on top. These were cut out leaving a thin white border around the image and then layered onto an Elegant Eggplant Scallop Square. The base layers were made with Elegant Eggplant and Old Olive cardstock glued onto a plain white card blank and the Scallop Squares positioned on top.


The last card shows the 'bunny' stamp which I stamped in So Saffron, Pretty in Pink, Pool Party, Bashful Blue and Certainly Celery. These were cut out with a circle punch and matted onto a Scallop Square punched from the corresponding colours in the DSP Paper Stacks. I cut a piece of white cardstock, just a bit smaller than a C6 card blank, and ran it through the Stripes Embossing Folder and then inked all around the edges with Pink Pirouette, glued the Scallop Squares into position and then layered the whole thing onto a card blank.


It only occurred to me while I was typing this post that, from just one set of four stamps, I have made cards suitable for Valentine's Day/Anniversary, a male birthday, a New Baby and an 'any other' occasion. There aren't many stamp sets that can cover so many different occasions and all with four stamps! At £10.95 for wood mount (£8.95 for clear) it's an absolute must-have but, remember, it's only available from the Spring Mini until 30th April so why not add it to your £45 wish list to qualify for your free SAB sets?


On a final note for today I wanted to share one of my 3-year old grandsons creations which he made at pre-school yesterday. It was for his Mummy and was made to celebrate the Chinese New Year. It was a red envelope which contained a gold chocolate coin and the gold painting on the front was his version of a dragon (I'm not sure but it looks like it could have been a rubber stamp!!)

Wednesday, 16 November 2011

Card & Pillow Box


Another little matching set, this time for an anniversary. I used the lovely Brushed Gold cardstock but unfortunately it doesn't show up too well in the photo. Something else which doesn't show up is a strip of embossing, done with the Stripes Embossing folder, on the Pillow Box and on the strip of gold running across the card.
The flower from Everything Eleanor was inked with Crumb Cake and then, using a sponge dauber, I dabbed on some Champagne Shimmer paint before stamping onto Very Vanilla. When the shimmer paint was dry I coloured the stamens using a Chocolate Chip marker and then cut the flowers out. The sentiment was inked in the same way and stamped directly on to the card blank. The leaves were made by running a piece of folded gold cardstock through the crimper and then a leaf shape was cut out freehand.

Monday, 10 October 2011

Gift set

It is my daughter's birthday and this is the set I have made for her. Bit of a butterfly theme going on here and this is not because she has any affinity with them, but purely because she wanted a memo board like the ones I have made previously! (middle right)
All made in Cherry Cobbler because she particularly likes red and I have used the Jolly Holiday DSP, which is now retired, for some of the embellishments.
The box (bottom left and bottom right) was made with the brand new Petal Cone die with the bottom points cut off, scored and made into a flat bottom box. I used the, also new, Scallop Dotted Ribbon punch to make a belly band and finished it off with butterflies cut with the Beautiful Wings Embosslits die and some Tiny Tags, cut with the Jewelry Tag punch. The money wallet is made with the Scallop Envelope die and  the embossed stripes on the birthday card was done with the new Stripes Embossing Folder and stamped with a sentiment from Perfect Pairs. I had great fun playing with all my new goodies and I'm sure you'll see much more of the gorgeous Petal Cone die - I love it!!!
Related Posts Plugin for WordPress, Blogger...