Pages

Showing posts with label Mixed Bunch. Show all posts

Sunday, 9 February 2014

Simples Sunday One Layer Card


I am a little late with my entry to the LIM challenge this week as, yesterday, I took part in a Blog Hop so I am combining it with my 'Simples Sunday' post again. The challenge this week is a 'One Layer - Anything goes' and I wanted to try something a little different so this is what I came up with. I used the Squares Collection Framelits to make some masks (which I have attempted to show you in the photo bottom right) and used a flower from Petite Petals and a smaller flower from Summer Silhouettes stamped in Elegant Eggplant. The lighter shade was achieved by stamping off first. The sentiment is from Perfectly Penned and I finished the card by adding a tiny Basic Rhinestone to three of the flowers.
This is a fairly simple card but if you want an even simpler one how about this?


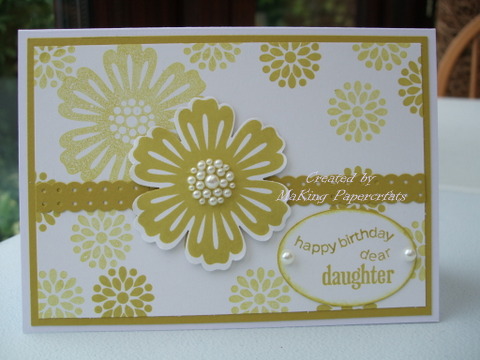
Three flowers from Mixed Bunch stamped across the card in Daffodil Delight, a few tiny flowers from Summer Silhouettes stamped in Pumpkin Pie and a sentiment from Four You, again using Pumpkin Pie - job done!!

Have a great rest of the weekend

Margaret x


Monday, 15 July 2013

Door hanger Treat Box


This is another item we made at our class last week and is a treat box which can be hung on a door. How impressed would your guests be if they found this filled with treats hanging on the their bedroom door?
It is made with Baked Brown Sugar, Chocolate Chip and Pistachio Pudding cardstock. The Pistachio Pudding cardstock was stamped with a butterfly from Papillon Potpourri before being layered onto the box.The hanging part was punched with the largest circle punch and the trim punched from the largest scallop circle punch. To decorate the front a stamp from Mixed Bunch was stamped in Baked Brown Sugar onto Very Vanilla and then punched with the co-ordinating Blossom punch. Another butterfly sits in the middle of the flower and is stamped, again in Baked Brown Sugar, and coloured in with Pistachio Pudding using a blender pen. All finished off with a sentiment from Bring on the Cake.
It looks like it's going to be another scorcher this week and I'm not much looking forward to having to go to work in it - never mind just over a week to go and then it will be the school holidays when I expect it will turn cold or wet again :0)


Saturday, 30 March 2013

Scallops


Good morning, well it's snowing - again! A good excuse for me to do a bit of catching up with my blog :0)
This week LIM have a guest designer, Lizy Bartaby, who has set the challenge of 'Scallops'. Lizy's projects are lovely so do pop over to her blog (here) and take a look.
Now I have a confession to make - today's entries were not made for the challenge, they were made a while ago but have just not managed to find their way onto my blog yet! They are scallops so I thought it was an ideal opportunity to kill two birds with one stone - get them on here and enter the challenge! I do love scallops so I'm sure I will be back with more entries specifically made!
The card and treat box were made for a friend's birthday using the Ovals Framelits collection and Bigz Alphabet Typeset dies with a stamp from Mixed Bunch. I used Baja Breeze DSP and, to get the scallops around the central oval, I punched a strip of DSP with the Scallop Border punch and snipped down each scallop to allow me to shape around the oval. The 'H' was cut from chipboard covered with DSP. The larger base oval was run through the Perfect Polka Dots Embossing folder before assembling the card. The treat box was made with the large scallop oval, again from the Ovals Framelits.
My second card is a wedding acceptance card using a stamp from Love & Laughter, silver embossed and matted onto Brushed Silver cardstock. The sentiment is computer generated and is matted onto a Scallop Oval.

Thursday, 21 March 2013

Mixed Bunch Birthday


The other day I showed you a gift box with cards that I had made for a friend so today I thought I would show you the co-ordinating birthday card to go with it. I masked off the left side of a square card blank with a post-it note before stamping a flower from Mixed Bunch in Rich Razzleberry (the ink was stamped off before stamping onto the card to get a lighter shade) and then added some leaves with a stamp from the SAB set, Bloomin' Marvelous, in Certainly Celery. I then added a strip of Sycamore Street (again SAB) before fixing another flower, which had been stamped and punched using the Blossom Punch, with dimensionals. Some Basic Pearls were added for the flower centre and a sentiment from Made for You in Rich Razzleberry.
The Made for You set is a lovely little sentiment set containing 3 stamps - 'especially for you' 'thank you' and happy birthday' in a really nice font and is a bargain at £10.95 for wood mount or £8.95 for clear mount. If you would like to order any of the supplies used (or indeed any others) please do not hesitate to contact me. (Details can be found at the 'Contact me' tab at the top)
Thank you for stopping by today and I'll be back soon x

Monday, 1 October 2012

ILWS Blog Hop


Welcome to the ILWS Blog Hop showcasing products from the brand new Autumn/Winter catalogue and the 2012-13 Ideas Book & Catalogue. Scroll down to see what I've been making.


You will have come to me from Laura, at http://lauracreativeideas.blogspot.com/ who's idea it was and who is the first stop on the blog hop.Thanks for organising us all Laura :0)
I won't go into too much detail as you will want to move on to see all the other projects from the lovely demo's taking part.  The first set of things are made with the Ghoulish Googlies Bundle & Howlstooth DSP


The B&W striped Milk Carton above holds a battery nite lite and the picture in the centre shows what it looks like lit up when it's dark! Credit for the ideas of the Notebooks (top right) goes to Vicky Hayes (aka Crafting Clare) and Ange Juda (aka Chic'n'Scratch) for the Two-Fold Treat holder (bottom right). Next thing to show you are projects made with the Autumn Accents Bigz Die


Left & Right are cards made with the die cut leaves/acorns which have been sponged, scored and curled to give dimension and in the centre is a wreath made from die cut leaves and acorns which have been made in the same way. On the wreath I added some Crystal Effects to the acorns to make them a little more 3D. My final projects are showing you the fabulous new 2012-14 In Colours - Raspberry Ripple, Gumball Green, Midnight Muse, Primrose Petals & Summer Starfruit. I used the Mixed Bunch stamp set & matching Blossom Punch along with the Adorning Accents Edgelits Dies and Embossing Folders which were all in the Summer Mini but have thankfully been carried over to the main catalogue.

Right I hope you're not too bored now after this long post and you will carry on happily 'hopping'. Your next stop is Angela over at http://www.sparklycards.blogspot.co.uk/

 Thanks for stopping by and enjoy the rest of your journey :0)
Just in case any of the links aren't working, below is a list of all the demos taking part
 1 - CreativeIdeas_Laura http://laura-creativeideas.blogspot.com
2 - Margaretk21 - http://makingpapercrafts.blogspot.com
3 - Angela www.sparklycards.blogspot.co.uk
4 - Leanie - www.beautifulimpressions.co.uk
5 - Alison - www.craftingalison.blogspot.com
6 - Beckie - www.bextiesandstickytape.blogspot.com
7 - Gill - http://lilybygilly.wordpress.com
8 - Diane - http://craftwithstyle.blogspot.com
9 - Dawn - www.tartanstamper.blogspot.com
10- Zoƫ http://www.stampingscene.blogspot.com
11- Fiona W - http://oakfieldcrafts.blogspot.com
12- Elaina - http://moulinrougestamps.blogspot.co.uk
13- Anne-Marie - http://classycrafters.blogspot.co.uk
14- Sarah - http://esellek.blogspot.co.uk
15- Vronnie - http://vronstampin.blogspot.co.uk
16- Christa - http://serendipity-stamping.blogspot.co.uk
17- RuthE - http://pearsonifiedcrafting.blogspot.co.uk
18- CarolynUK - http://stampaholix.blogspot.co.uk/
19- Amanda - http://thecraftspa.blogspot.com
20- Patricia - http://stampinbeckscraft.blogspot.com
21- Tara - http://ihaventgotacleverblogname.blogspot.co.uk
22- Emma (Citaborca) - http://cocktailofcard.blogspot.co.uk/
23- Emma H - http://www.emma-letsstamp.blogspot.co.uk
24- Sarah Scribbles - http://card-delights.blogspot.com
25- Sarnie - http://www.kraftybiker.blogspot.com/
26- Sharon - http://all-inked-up-sharon.blogspot.co.uk
27- Lynn - http://www.heavenlycrafts.com/stampinheaven/
28- Emma - http://www.emma-daye.blogspot.com
29- Erika - http://twintroublescreations.blogspot.co.uk/
30- Elaine - http://thesassystampers.blogspot.co.uk/
31- Nicky - http://nickyjohncock.blogspot.com
33- Kara - http://karascraftycorner.blogspot.com/
34- Ally - http://www.serendipitypapercuts.blogspot.com
35- Clare (Sparkle) - http://www.sparklecrafts.blogspot.com
36- Julie H (craftybug) - http://www.the-crafty-bug.blogspot.com
37- Jane (browniow) - http://www.janeiowcraftycreations.blogspot.com/


Friday, 21 September 2012

Mixed Bunch Birthday


My apologies for being AWOL again! The saga still continues with Dad and, added to that, I've had a streaming cold for 10 days which doesn't seem to want to go - I think I must be looking after it too well :0) Hence not too much crafting getting done at the moment. However it is my sister's birthday today and this is a card I made for my Mum to give to her. I used a couple of the stamps from Mixed Bunch, which was available in the Summer Mini, along with the co-ordinating Blossom Punch both of which, I can tell you, will be making a reappearance in the brand new annual catalogue available from 1st October. I used one of the new In Colours, Summer Starfruit, which was stamped off to get some paler images. The sentiment is part of a stamp in the Happiest Birthday Wishes Hostess set, coloured with a marker and teamed with anotehr stamp from For my Family and punched with the Extra Large Oval Punch. A strip of cardstock punched with the Dotted Scallop Ribbon punch was added across the centre of the card, the central punched flower was added with dimensionals and Basic Pearls finished the card. I also added a bit of stamping to the envelope by using a post-it note as a mask.
Hope to be back soon, have a lovely weekend x
Related Posts Plugin for WordPress, Blogger...